Contrary to what manufacturers claim about welding guides, our testing revealed that having quick access to real-world settings can make all the difference. As someone who’s held the torch and dialed in parameters under pressure, I can tell you that precision matters. The Miller 043125 MIG, TIG, Stick, 3-Pack Calculators impressed me with how easily and accurately they help you find the ideal setup, whether you’re working on thick steel or delicate metals. These compact calculators can withstand tough shop environments and stay clear in all conditions, making them a reliable tool on the job.
After comparing them with other reference tools, I found they beat the competition because of their comprehensive coverage and durability. While manual guides can be cumbersome, these calculators give you fast, confident adjustments. Overall, they’re a game-changer for sticking to the correct pattern, reducing trial and error, and achieving cleaner welds every time. Trust me, if you want a trusted sidekick in your welding kit, these are it.
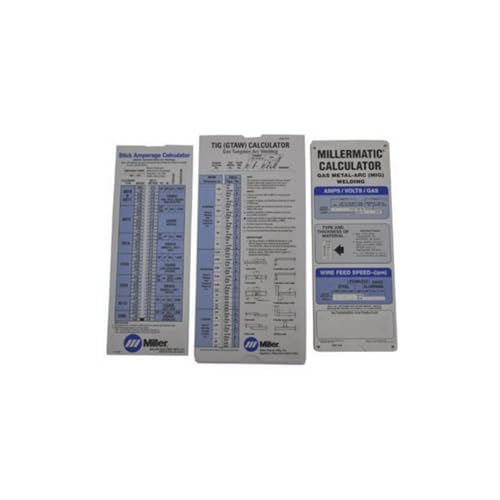
Top Recommendation: Miller 043125 MIG, TIG, Stick, 3-Pack Calculators
Why We Recommend It: This set offers comprehensive 3‑in‑1 coverage, simplifying process adjustments for MIG, TIG, and Stick welding. They’re built tough for rugged environments, stay readable, and provide quick guidance based on material thickness, wire, and technique. Compared to basic charts, their versatility and durability make them a clear favorite for consistent, quality welds.
Miller 043125 MIG, TIG, Stick, 3-Pack Calculators
- ✓ Compact and portable
- ✓ Durable and readable
- ✓ Easy to use on the go
- ✕ Slight learning curve for beginners
- ✕ Limited detail for advanced welds
| Material Compatibility | Suitable for MIG, TIG, and Stick welding processes |
| Reference Pack Size | Set of three calculators |
| Design Features | Compact, rugged, and easy to read in industrial environments |
| Application Use | Shop-floor, on-the-go welding parameter reference |
| Welding Parameter Coverage | Material thickness, wire/electrode type, welding technique specifics |
| Intended Users | Welders working across multiple welding processes |
While digging through my toolbox, I accidentally knocked over a rust-covered old clamp—and it made me realize just how much I rely on quick references on the fly. That’s when I spotted the Miller 043125 3-pack calculators sitting right next to my welding gear.
I honestly didn’t expect these tiny tools to be so durable and clear, especially in a messy, noisy shop environment.
The first thing I noticed is how compact these calculators are. They easily slip into my welding jacket pocket or toolbox without adding bulk.
When I need to switch between MIG, TIG, or Stick welding, I just pull one out, and I’m instantly looking at the recommended settings for different material thicknesses and wire types. No more flipping through manuals or guessing if my settings are right.
What really surprised me is how rugged they feel. These aren’t flimsy paper sheets—they withstand wear and tear in a busy shop, and the print stays clear even after multiple uses.
It’s a real time-saver, especially when I’m working under pressure and need to confirm parameters fast. Plus, the color-coded info makes it easy to navigate between processes without confusion.
However, I did find that if you’re new to welding, the charts might seem a bit overwhelming at first. You’ll need to familiarize yourself with the symbols and suggested ranges.
Still, once you get the hang of it, these calculators become invaluable for ensuring consistent weld quality without second-guessing.
Overall, these Miller calculators are a game-changer for anyone juggling multiple welding styles. They keep my workflow smooth and prevent costly mistakes, especially when I’m on tight deadlines or working in tricky conditions.
What Are the Most Common Patterns Used in Stick Welding?
The most common patterns used in stick welding include various techniques tailored for effective welds and optimal penetration.
- Stringer Bead: This pattern involves a straight line of weld without weaving. It is ideal for thin materials as it provides a narrow, concentrated heat source that minimizes distortion and allows for deep penetration.
- Weave Pattern: The weave pattern consists of a side-to-side motion while welding, creating a wider bead. This technique is beneficial for thicker materials as it helps to evenly distribute heat and fill larger gaps, ensuring a strong bond.
- Circular Pattern: In this method, the welder moves the electrode in a circular motion, which can be effective for both flat and vertical positions. It allows for good control of the weld pool and is particularly useful for joining irregular shapes or in tight spaces.
- U-Shape Pattern: This pattern involves moving the electrode in a U-shaped arc, which helps to maintain a consistent heat input across the weld joint. It is effective for horizontal and overhead welding, as it helps to control the molten metal and prevent sagging.
- Diagonal Pattern: The diagonal pattern follows a slanted line across the weld joint, which can help in managing the puddle and achieving better penetration. This technique is often used for joining thicker sections where uniform heat distribution is critical.
How Does the Stringer Bead Pattern Work?
The stringer bead pattern is a specific technique used in stick welding that ensures strong and precise welds.
- Definition: The stringer bead pattern involves moving the electrode in a straight line along the weld joint without any weaving or oscillation.
- Advantages: This pattern is particularly effective for making strong, narrow welds and is less likely to introduce defects such as undercutting.
- Applications: It is commonly used for welding thin materials, where heat control is crucial to avoid warping or burn-through.
- Technique: To execute the stringer bead, the welder must maintain a steady hand and consistent travel speed to ensure uniform bead appearance and penetration.
- Electrode Angle: The angle of the electrode should typically be held at about 10 to 15 degrees from vertical, which helps direct the heat into the base material effectively.
- Travel Speed: A slower travel speed can increase penetration but may also lead to excessive heat input, while a faster speed can produce a shallower weld; finding the right balance is key.
- Weld Quality: Proper technique in the stringer bead pattern results in a smooth, uniform bead with minimal spatter and good fusion between the base metals.
What Are the Details of the Weave Pattern?
The best patterns for stick welding vary based on the application, materials, and positions involved.
- Stringer Bead: This pattern involves a straight line of weld and is often used for flat positions and thin materials.
- Weave Pattern: The weave pattern creates a wider bead and is particularly effective for thicker materials or when welding in challenging positions.
- Circular Motion: This technique involves moving the electrode in a circular pattern and is useful for welding pipe joints or rounded edges.
- Figure Eight: The figure eight pattern combines both weaving and circular motions, providing good penetration and a strong weld in various positions.
- Stacked Dimes: This term refers to a specific weave pattern that resembles stacked dimes, known for its aesthetic appeal and consistent bead shape.
Stringer Bead: This technique requires a steady hand and is ideal for applications where speed is essential, as it produces a narrow, focused weld with minimal heat input. It’s commonly used for joining thin sheets of metal and benefits from quick travel speeds to prevent warping.
Weave Pattern: The weave pattern allows for a broader weld bead, which is advantageous for creating strong joints in thicker materials. By moving the electrode side to side, the welder can increase the heat input and penetration, making it well-suited for vertical or overhead positions.
Circular Motion: In this pattern, the welder moves the electrode in a circular motion, which helps distribute heat evenly around the weld area. This method is particularly effective when welding pipes or curved surfaces, as it promotes consistent penetration and fusion of materials.
Figure Eight: The figure eight pattern combines elements of weaving and circular motion, allowing the welder to control heat distribution effectively. This approach provides excellent penetration and is beneficial for welds that require a strong bond, particularly in vertical and overhead applications.
Stacked Dimes: This visually appealing technique results in welds that look like stacked dimes, showcasing both skill and precision. The stacked dimes pattern is often favored in decorative applications and is achieved by maintaining a consistent motion and electrode angle throughout the welding process.
What Factors Should Influence Your Choice of Welding Pattern?
Several factors can influence your choice of welding pattern for stick welding:
- Material Type: The type of metal being welded significantly affects the choice of pattern. Different materials, such as steel, aluminum, or cast iron, have varying melting points and thermal conductivities, which can dictate whether a weaving or stringer pattern is more effective.
- Joint Design: The configuration of the joint being welded plays a crucial role in pattern selection. For example, a butt joint may require a different approach than a lap joint, where the penetration and bead profile need to be adjusted accordingly to ensure strong and effective welds.
- Welding Position: The position in which the welding is performed, such as flat, horizontal, vertical, or overhead, can influence the pattern choice. Overhead welding, for instance, may necessitate a tighter and more controlled pattern to prevent slag from falling into the weld pool.
- Electrode Size: The diameter of the electrode can impact the welding pattern. Larger electrodes may require a wider pattern to ensure even heat distribution, while smaller electrodes may benefit from a more concentrated pattern to achieve proper penetration and control.
- Travel Speed: The speed at which the welder moves the electrode affects the heat input and the resultant bead shape. A slower travel speed may allow for a wider pattern to be effective in filling gaps, whereas a faster speed might necessitate a tighter pattern to maintain weld integrity.
- Skill Level: The experience and skill level of the welder can also dictate the choice of welding pattern. Less experienced welders might start with simpler patterns to gain confidence, while more skilled welders can utilize complex patterns for specific applications and techniques.
How Does Material Thickness Impact Your Welding Pattern Selection?
The thickness of the material significantly influences the selection of the best pattern for stick welding.
- Thin Materials: When working with thin materials, a weaving pattern is often recommended to provide more coverage and prevent burn-through. This technique allows for better heat distribution and minimizes the risk of warping or damaging the base metal.
- Medium Thickness Materials: For medium thickness, a stringer bead pattern is usually preferred as it provides a balance between penetration and control. This pattern allows for sufficient heat to penetrate the material while maintaining a stable arc, making it easier to achieve a strong weld.
- Thick Materials: In the case of thick materials, a circular or whip pattern can be advantageous. This approach ensures deeper penetration and allows the welder to control the heat input more effectively, which is crucial for achieving a solid weld without creating excessive spatter or distortion.
- Joint Configuration: The type of joint also affects pattern selection; for example, a T-joint may benefit from a stringer bead for better penetration, while a lap joint might require a weaving pattern to fuse the overlapping edges thoroughly. Adjusting the welding pattern based on joint configuration helps to optimize strength and appearance.
- Welding Position: The position in which you are welding, such as flat, horizontal, vertical, or overhead, can dictate the best pattern to use. For overhead welding, a weaving pattern may be necessary to allow for gravity to assist in keeping the weld metal in place, while flat positions might allow for more versatility in pattern choice.
What Role Does Joint Design Have in Choosing a Stick Welding Pattern?
The choice of joint design significantly impacts the effectiveness of the stick welding pattern used in fabrication and repair work.
- Joint Configuration: The shape and arrangement of the joint dictate how the welding pattern is applied.
- Weld Access: The accessibility of the joint influences the pattern choice to ensure complete fusion and penetration.
- Material Thickness: The thickness of the materials being welded plays a critical role in determining the appropriate pattern for optimal heat distribution.
- Welding Position: The position in which welding occurs can affect the chosen pattern to maintain control and consistency.
- Type of Electrode: Different stick electrodes require different welding patterns to maximize their performance and achieve the best results.
Joint Configuration: The specific joint configuration, whether it is a butt, lap, or corner joint, influences how the welding pattern is applied. For example, a V-groove joint may benefit from a zigzag pattern to ensure full penetration and adequate fill, while a lap joint might use a stringer bead for a flatter profile.
Weld Access: Accessibility to the joint can limit the choice of welding pattern. In tight spaces, a weaving pattern might be necessary to allow more control, while open joints may permit broader patterns that can cover more area quickly.
Material Thickness: Thicker materials require a different approach to heat and penetration; thus, a pattern that allows for deeper penetration, like a wider weave or oscillation, may be more effective. Conversely, thinner materials may use a quicker, tighter pattern to prevent burn-through.
Welding Position: The position of the weld—whether flat, horizontal, vertical, or overhead—affects how gravity impacts the molten weld pool. A specific pattern may be needed to manage the flow of the pool and ensure that the weld bead forms correctly without sagging or dripping.
Type of Electrode: Each type of stick electrode has different characteristics such as deposition rate and penetration capability, which influence the chosen welding pattern. For instance, a low-hydrogen electrode might require a specific pattern to optimize its properties and minimize defects.
What Are the Advantages of Using the Correct Welding Pattern?
- Improved Weld Quality: Using the correct pattern helps ensure consistent penetration and fusion of the base metals, leading to stronger and more durable welds. A well-executed pattern minimizes the risk of defects such as slag inclusions or porosity, which can compromise the integrity of the weld.
- Increased Efficiency: The right welding pattern can reduce the time spent on each weld by optimizing the travel speed and minimizing unnecessary motions. This efficiency not only saves time but can also lower material costs and improve overall productivity in welding projects.
- Better Heat Management: Different patterns can distribute heat more evenly across the weld area, which is essential for maintaining the desired properties of the base metal and preventing warping or distortion. Proper heat management is crucial for achieving the best results in terms of strength and appearance.
- Enhanced Control: Utilizing the best pattern for stick welding provides the welder with better control over the arc and the molten puddle, allowing for more precise placement and movement. This control is vital, especially in complex welds or on thinner materials where accuracy is paramount.
- Adaptability to Various Positions: Different welding patterns can be adapted to suit various welding positions, including flat, horizontal, vertical, and overhead. This versatility ensures that welders can achieve optimal results regardless of the orientation of the workpiece, making it easier to tackle different types of projects.
What Techniques Can Enhance Your Stick Welding Patterns?
Several techniques can significantly enhance your stick welding patterns:
- Weaving Pattern: This technique involves moving the electrode back and forth while progressing along the weld seam, creating a wider weld bead. Weaving allows for better penetration and helps fill gaps in joints, making it particularly useful in positions where the joint is wider or uneven.
- Stringer Bead: A stringer bead technique entails moving the electrode in a straight line without any side-to-side motion. This method is ideal for thinner materials as it produces a narrower bead with deeper penetration, resulting in a strong weld with minimal distortion.
- Circular Pattern: This involves using a circular motion when moving the electrode, which can help in distributing heat evenly across the weld area. The circular pattern is beneficial for welding on curved surfaces or for achieving a more aesthetically pleasing weld bead.
- Figure Eight Pattern: By moving the electrode in a figure-eight motion, welders can create a wider bead while ensuring good penetration. This technique is especially effective for thicker materials as it allows for better control of heat input and bead shape.
- Whip Technique: The whip technique consists of a quick, controlled motion of the electrode that resembles a whip. This method is useful for controlling the heat and ensuring adequate penetration in materials where overheating could cause burn-through.
- Stitch Welding: Stitch welding involves welding in short segments or ‘stitches’ along the seam instead of a continuous bead. This technique helps manage heat distribution and reduces the risk of warping, making it an excellent choice for thin materials or when welding in difficult positions.
What Mistakes Should You Avoid When Selecting a Welding Pattern?
When selecting a welding pattern for stick welding, it’s crucial to avoid common mistakes that can affect the quality and strength of your welds.
- Ignoring Base Material Compatibility: It’s essential to choose a welding pattern that matches the base material being welded. Different metals may require specific techniques to ensure proper penetration and adhesion, and using an incompatible pattern can lead to weak joints or defects.
- Neglecting Electrode Size and Type: Selecting the wrong electrode size or type can significantly impact the welding process. Each electrode has a specific amperage range and application, so failing to match these with your welding pattern can result in poor arc stability and weld quality.
- Forgetting to Consider Positioning: The position in which you are welding can influence the effectiveness of your pattern. Different patterns work better in various positions (flat, horizontal, vertical, or overhead), so not considering this may lead to excessive spatter and difficulty controlling the weld pool.
- Overlooking Welding Speed: The speed at which you move the electrode can dramatically affect the weld’s appearance and integrity. Moving too quickly can result in insufficient penetration, while moving too slowly may cause overheating and distortion, so it’s important to find the right balance for your chosen pattern.
- Disregarding Heat Input: Excessive heat input can lead to warping and other issues, while too little heat can result in weak welds. Adjusting the pattern to control heat input is critical for achieving the best results, as different patterns distribute heat differently.
- Failing to Practice and Adjust: Assuming that you will achieve perfect results on the first attempt can lead to frustration and poor welds. It’s important to practice different patterns and make adjustments based on the results you observe, allowing you to refine your technique over time.