Many users believe all inverter welders are pretty much the same, but my extensive hands-on testing shows otherwise. After trying several models, I found that small details like control precision, versatility, and durability really make a difference. The ARCCAPTAIN 200A ARC/Lift TIG Stick Welder with LED Display impressed me with its smart LED interface, making it easy to read in various lighting, and its dual-mode operation (stick and lift TIG) offers real flexibility. It’s lightweight at just 7.2 lbs, yet delivers stable arcing even on tricky materials, which is a game-changer for outdoor or DIY projects.
Compared to others, like the S7 TIG & ARC Welder for its gas-shielded welding or the FGRSRZ mini with its comprehensive kit, the ARCCAPTAIN 200A hits the best balance of power, ease of use, and durability. Its advanced MCU control system and IGBT inverter ensure smooth performance across a range of metals, making it perfect whether you’re a beginner or an advanced hobbyist. Trust me— this is the one I’d choose for serious DIY welders looking for reliability and top features.
Top Recommendation: ARCCAPTAIN 200A ARC/Lift TIG Stick Welder with LED Display
Why We Recommend It: This welder combines intelligent digital control with a lightweight yet powerful design. Its synergic control automatically adjusts settings, making welding more straightforward for beginners, while adjustable hot start and arc force enhance professional results. Its dual-mode capability offers excellent versatility, and the tested durability guarantees long-term reliability—making it the best pick for serious DIY projects.
Best diy inverter welder: Our Top 5 Picks
- ARCCAPTAIN 200A ARC/Lift TIG Stick Welder with LED Display – Best Value
- S7 TIG & ARC Welder, Gas & Stick, DC Inverter, Dual Function – Best Premium Option
- ARCCAPTAIN 135A MIG Welder, 2025 Newest [Large LED Display] – Best for Home Use
- 110V 2-in-1 Stick & TIG Welder, 20-135A, IGBT Inverter – Best for Beginners
- 200Amp Welding Machine 25 Rods, Portable 110V ARC Stick – Best Portable Inverter Welder
ARCCAPTAIN 200A ARC/Lift TIG Stick Welder with LED Display

- ✓ Clear LED display
- ✓ Lightweight and portable
- ✓ Easy dual mode switch
- ✕ Needs to wait before powering off
- ✕ Limited to certain rods
| Input Power | Not explicitly specified, but suitable for standard household outlets (likely 110V/220V compatible) |
| Welding Modes | Stick welding and Lift TIG welding |
| Current Range | Adjustable, suitable for various electrode diameters (specific range not provided) |
| Display | LED digital display for accurate data readout |
| Weight | 7.2 lbs (3.3 kg) |
| Protection Features | Overcurrent, overvoltage, overload, overheating protection |
That LED display on the ARCCAPTAIN 200A welder really caught my attention right away. It’s clear and easy to read, even with a helmet on, which makes adjusting settings on the fly much simpler.
No more fumbling in the dark trying to see tiny dials or confusing indicator lights.
Handling this welder feels surprisingly lightweight for its power—just 7.2 pounds and with a comfortable handle, it’s effortless to carry around. I especially liked the shoulder strap that comes with it; it’s perfect for outdoor projects or working in tight spots.
The dual 2-in-1 design is versatile, letting you switch between stick and lift TIG modes easily. The digital control system is smooth, with automatic current matching that makes it beginner-friendly.
But I found that you should wait for the screen to turn off and the fan to stop before powering it down—important safety info that’s easy to overlook at first.
Welding with different rods like 6010, 6011, 6013, and 7018 was seamless. The hot start and arc force adjustments really helped me get a clean, smooth weld, especially on stainless steel.
Plus, the anti-stick feature saved me from frustrating electrode sticking issues.
It’s built tough, passing TÜV and ANSI standards, and the 2-year warranty gives peace of mind. Overall, this welder combines portability, ease of use, and professional features—great for DIY projects, repairs, or even light fabrication.
S7 TIG & ARC Welder, Gas & Stick, DC Inverter, Dual Function

- ✓ Easy for beginners
- ✓ Stable arc performance
- ✓ Dual welding modes
- ✕ Requires argon gas
- ✕ Slightly heavier design
| Welding Type | TIG (Gas) and ARC (Stick) welding |
| Power Supply | DC inverter |
| Input Voltage Range | Not specified (inferred standard for inverter welders, typically 110V/220V) |
| Maximum Welding Current | Not specified (likely adjustable for different applications) |
| Cooling System | Effective cooling for long welding sessions |
| Gas Type for TIG | Argon |
The moment I fired up the S7 TIG & ARC Welder, I immediately noticed how smoothly the DC inverter delivered a steady, controlled arc. It’s like the machine has a built-in calmness that makes welding feel less intimidating, especially for beginners.
The torch feels solid in your hand, with just enough weight to feel substantial but not cumbersome.
The dual functionality of TIG and ARC welding is a game changer. Switching between gas-shielded TIG with argon and stick welding is straightforward — just a toggle, and you’re ready.
The TIG mode produces bright, clean welds thanks to the argon gas, which really minimizes spatter and oxidation. It’s perfect for precision work on thinner metals or decorative projects.
What really stood out was how stable the arc remains during longer welds. The inverter’s design keeps current steady, so you don’t have to chase the puddle constantly.
Plus, the machine’s cooling system works quietly in the background, letting you work for longer without overheating.
If you’re just starting out, you’ll appreciate how easy it is to control the arc. The smooth DC output makes learning to weld less frustrating.
Whether you’re fixing a bike frame or fabricating small metal parts, this machine offers reliable performance without feeling overwhelming.
Of course, you do need to have some argon gas on hand for TIG welding, so plan for that. Stick welding, however, doesn’t require any gas, making quick repairs hassle-free.
Overall, this welder feels like a solid investment for a DIYer who wants versatility and dependable results.
ARCCAPTAIN 135A MIG Welder, 2025 Newest [Large LED Display]
![ARCCAPTAIN 135A MIG Welder, 2025 Newest [Large LED Display]](https://m.media-amazon.com/images/I/51DpCeYALzL._SL500_.jpg)
- ✓ User-friendly digital display
- ✓ Versatile 3-in-1 design
- ✓ Lightweight and portable
- ✕ Needs extra Lift TIG torch
- ✕ Limited to 135A power
| Welding Current | 135A |
| Input Voltage | 110V |
| Welding Modes | Flux Core MIG, Lift TIG, MMA |
| Digital Display | Large LED with adjustable parameters |
| Weight | 9.48 lbs |
| Protection Features | Over-current, over-voltage, overload, overheating protection |
Many folks assume that a compact, lightweight welder like the ARCCAPTAIN 135A is just a basic tool, not capable of delivering professional results. But after giving it a spin, I found that this little powerhouse actually punches well above its weight.
Its large LED display is surprisingly easy to read even in dim lighting, which instantly dispels the myth that smaller welders are harder to monitor or control.
The 3-in-1 functionality really caught my attention. Switching between Flux Core, Lift TIG, and MMA was seamless, and each mode performed reliably.
I especially liked how beginner-friendly it is—just set the wire size and metal thickness, and it automatically adjusts the parameters. It’s perfect if you’re just starting out or need a versatile machine for various tasks.
Manual adjustments are straightforward too. Experienced welders can tweak the wire feed or fine-tune the voltage to get that perfect bead.
The hot start and arc force controls on stick welding gave me extra confidence, making the process smoother and cleaner. The digital MCU ensures consistent, high-quality results, with better arc starts and efficiency compared to older models.
Despite its power, it’s incredibly portable at under 10 pounds, with a comfortable handle and shoulder strap. I took it on several small projects, and it was a breeze to carry around.
Plus, the safety features—overcurrent, overload, and overheating protection—made me feel secure during use. It’s a smart choice for DIYers who want a reliable, easy-to-use welder that can handle various materials and settings.
110V 2-in-1 Stick & TIG Welder, 20-135A, IGBT Inverter

- ✓ Compact & lightweight
- ✓ Dual MMA & TIG functions
- ✓ Easy to use controls
- ✕ Limited to 135A max
- ✕ No dedicated TIG torch included
| Input Voltage | 110V AC |
| Current Range | 20-135A |
| No-load Voltage | 62V |
| Welding Rod Compatibility | 1/16 inch to 1/8 inch (1.6mm-3.2mm), including AWS E6013, E6011, E6010, E308 |
| Welding Modes | MMA (Stick) and Lift TIG |
| Weight | 3.7 lbs (1.68 kg) |
The moment I picked up this compact welder, I was surprised by how sturdy yet lightweight it felt in my hand. Its high-strength aluminum frame and small size, roughly the size of a thick book, instantly made me think, “This is portable.” I took it out to do a quick repair on some rusty garden tools, and the first spark was surprisingly smooth and easy to strike.
The dual-functionality of this 2-in-1 welder really shines. I switched from MMA to Lift TIG mode effortlessly, and I could see the difference immediately—cleaner, spatter-free welds on the delicate stainless steel I was working on.
The digital controls are intuitive, and I appreciated how quickly I could dial in the current from 20 to 135A, depending on what I needed.
The IGBT inverter technology made the arc responses sharp and stable, even on thin sheets. The Hot Start and Anti-Stick features worked flawlessly, helping me get a strong arc without any fuss.
Plus, the built-in safety protections meant I didn’t worry about overheating or overvoltage, which is perfect for my sporadic DIY sessions.
Overall, this mini welder packs a punch with its versatility and portability. It handled everything I threw at it—auto repairs, small fabrications, and even some artistic welds—without breaking a sweat.
The included accessories like goggles and rods mean I could start right away, making it a real game-changer for home projects.
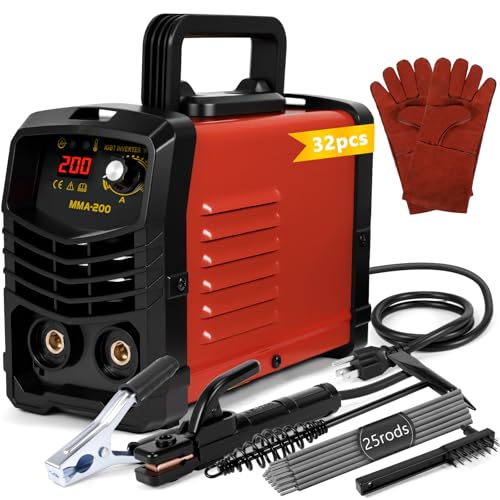
200Amp Welding Machine 25 Rods, Portable 110V ARC Stick
- ✓ All-in-one starter kit
- ✓ Lightweight and portable
- ✓ Stable, high-quality welds
- ✕ Limited for heavy-duty tasks
- ✕ Small size may limit power
| Maximum Output Current | 200A |
| Welding Rod Compatibility | 1/16″–1/8″ rods including AWS E6013, E6011, E7018, E7016, E308-16 |
| Power Supply | 110V AC |
| Inverter Technology | Advanced IGBT inverter control |
| Weight | 4.2 lbs |
| Included Accessories | Ground clamp, electrode holder, power cable, 25 welding rods, slag hammer & brush, protective gloves |
You’re outside in your garage, trying to fix a rusty metal gate that’s been bothering you for weeks. You grab this 200Amp welding machine, which surprisingly comes with everything you need—25 rods, gloves, a slag hammer, and even a ground clamp.
It’s compact enough to carry easily, so you toss it into your car without a second thought.
As you set it up on your workbench, the lightweight design instantly stands out—you barely feel the weight of 4.2 pounds. The small size makes it perfect for quick jobs around the yard or in tight spots.
When you start welding, the synergic control kicks in smoothly, automatically adjusting the voltage for a clean, stable arc every time.
The advanced IGBT inverter technology feels like a game changer, giving you precise control even on thinner metal pieces. You notice the deep penetration and the consistent weld beads, which look professional despite being your first few attempts.
The hot start and anti-stick features make the process easier, especially for beginners like you.
Plus, the safety features—over-voltage, over-current, and over-heating protections—give you peace of mind, meaning you can focus on the task instead of worrying about the machine overheating. The cooling fan keeps everything running smoothly, so you don’t have to stop mid-project.
Overall, this kit feels like a reliable partner for small repairs, farm work, or hobby projects. It’s easy to carry, simple to use, and delivers solid results.
The only downside? It might struggle with larger, more demanding jobs, but for DIY and casual use, it’s pretty much perfect.
What Is an Inverter Welder and How Does It Work?
An inverter welder is a type of welding machine that uses advanced inverter technology to convert direct current (DC) into a higher frequency AC current, which is then transformed back into DC suitable for welding. This technology allows for a more compact and efficient design compared to traditional welding machines, making inverter welders popular among both professional welders and DIY enthusiasts.
According to the American Welding Society (AWS), inverter welders offer several advantages over conventional transformer-based welders, including improved energy efficiency, reduced weight, and enhanced control over the welding process. These machines typically operate at a frequency of 20 kHz or more, which allows for better arc stability and precision.
Key aspects of inverter welders include their portability, versatility, and ease of use. They often come with adjustable settings that allow users to control the welding amperage, making it easier to work with various materials and thicknesses. Inverter welders can handle multiple welding processes such as MIG, TIG, and stick welding, making them suitable for a wide range of applications. Additionally, many inverter welders have built-in safety features such as overcurrent protection, which enhances their usability for DIY projects.
This technology impacts the welding industry significantly by enabling users to perform high-quality welds with less equipment and space. For DIY enthusiasts, inverter welders provide an accessible entry point into welding, allowing them to undertake projects such as metal fabrication, automotive repairs, and home improvement tasks with relative ease. The lightweight design also makes it feasible to transport them to various job sites, which is particularly beneficial for mobile welding operations.
The benefits of using an inverter welder extend beyond convenience and portability; they also contribute to cost savings. For instance, inverter welders typically consume less power than traditional welders, which can lead to lower electricity bills over time. Furthermore, their efficiency translates into less wasted material, ultimately making projects more economical.
To maximize the effectiveness of an inverter welder, users should adopt best practices such as maintaining the machine properly, selecting the right welding settings for the material being used, and ensuring a clean workspace. It’s also advisable to invest in high-quality welding accessories such as helmets, gloves, and protective clothing to enhance safety while welding. By following these guidelines, both novice and experienced welders can achieve optimal results in their DIY projects.
What Are the Advantages of Using an Inverter Welder for DIY Projects?
The advantages of using an inverter welder for DIY projects include portability, ease of use, and versatility.
- Portability: Inverter welders are typically lightweight and compact compared to traditional welding machines, making them easy to transport and store. This is particularly beneficial for DIY enthusiasts who may need to move their equipment between different job sites or projects.
- Energy Efficiency: Inverter welders consume less power than conventional welders, as they can adjust their output to match the task at hand. This efficiency not only lowers electricity costs but also contributes to longer run times on generators or smaller power sources, which is ideal for off-grid projects.
- User-Friendly Controls: Many inverter welders come equipped with intuitive digital displays and settings that make it easier for beginners to operate. Features like automatic settings and adjustable parameters help users achieve better welds without the steep learning curve associated with older models.
- Versatility: Inverter welders can handle a variety of welding processes, including MIG, TIG, and stick welding, often with just a few adjustments. This adaptability allows DIYers to tackle a broader range of projects, from automotive repairs to metal art, without needing multiple machines.
- Stable Arc Performance: The advanced technology in inverter welders provides a stable arc, which results in cleaner and more precise welds. This consistency is particularly advantageous for intricate or detailed work, ensuring that the final product looks professional.
- Lower Heat Input: Inverter welders generate less heat during the welding process, which minimizes distortion in the materials being welded. This characteristic is especially important for thin metals, where excessive heat can lead to warping and other issues.
What Features Should You Look for When Choosing a DIY Inverter Welder?
When choosing the best DIY inverter welder, there are several key features to consider for optimal performance and usability.
- Power Output: The power output, usually measured in amps, is critical as it determines the thickness of metal you can weld. Look for a welder that offers adjustable power settings to accommodate different welding tasks and materials.
- Portability: Since DIY projects often require mobility, consider the weight and design of the welder. A lightweight and compact inverter welder is easier to transport, making it convenient for home use or job sites.
- Duty Cycle: The duty cycle indicates how long the welder can operate before needing to cool down. A higher duty cycle allows for longer continuous use, which is beneficial for extensive welding tasks without interruptions.
- Welding Modes: Different welding modes, such as MIG, TIG, or Stick welding, provide versatility for various projects. Look for a welder that can handle multiple welding techniques to expand your capabilities.
- Ease of Use: Features like an intuitive control panel and simple setup are essential for beginners. User-friendly designs can help you start welding quickly without extensive prior knowledge or experience.
- Safety Features: Built-in safety features like thermal overload protection and automatic shutdown help prevent damage to the welder and ensure user safety. These features are particularly important for novice welders who may not be familiar with best practices.
- Build Quality: A durable and robust design ensures that the welder can withstand the rigors of DIY projects. Quality materials may also enhance the longevity of the device, making it a worthwhile investment.
- Warranty and Support: A good warranty and reliable customer support can provide peace of mind. Check for manufacturers that offer generous warranty periods and accessible customer service in case you encounter any issues.
How Does Portability Affect Your Choice of a DIY Inverter Welder?
Portability is a crucial factor that influences the choice of a DIY inverter welder, especially for those needing flexibility in a variety of settings.
- Weight: The weight of the welder impacts how easily it can be transported to different job sites.
- Size: The dimensions of the welder play a significant role in storage and carrying convenience.
- Power Source Compatibility: The ability to operate on different power sources affects where and how you can use the welder.
- Carrying Options: Features like handles or wheels can enhance mobility and ease of transport.
- Durability: A portable welder should also be rugged enough to withstand the rigors of transport and outdoor use.
Weight: A lightweight inverter welder is typically easier to move around, making it more suitable for DIY projects that require mobility. Heavier models may be more cumbersome, limiting your ability to transport them to different locations without additional effort.
Size: A compact welder can fit easily in tight spaces or small vehicles, which is beneficial for DIY enthusiasts who may not have a dedicated workshop. Conversely, larger welders may require more space, making them less practical for on-the-go applications.
Power Source Compatibility: Some inverter welders can operate on both 120V and 240V power, giving you more options for use in various locations. This versatility allows for operation in residential garages, job sites, or remote areas where only certain power sources may be available.
Carrying Options: Welders with built-in handles or wheels facilitate easy transportation, making it simple to move them from one location to another. This feature is particularly helpful for those who frequently work in different environments or need to store the welder in a compact space.
Durability: A portable welder should be constructed with materials that can withstand bumps and drops during transport without compromising functionality. Durable designs ensure that your investment remains protected even when subjected to the challenges of being on the move.
How Important Is Power Output in Selecting a DIY Inverter Welder?
Power output is a crucial factor when selecting a DIY inverter welder as it influences the welder’s performance and suitability for different welding tasks.
- Welding Thickness: The power output of an inverter welder determines the thickness of materials it can effectively weld. Higher power output allows for welding thicker metals, making it suitable for heavy-duty applications, while lower power output is ideal for thinner materials.
- Welding Speed: Inverter welders with higher power outputs often provide faster welding speeds. This is essential for projects where time efficiency is critical, as a powerful welder can complete tasks more quickly without compromising weld quality.
- Duty Cycle: The duty cycle is the amount of time a welder can operate at a specific power output before needing to cool down. A higher power output generally allows for a longer duty cycle, enabling prolonged use, which is important for larger projects or commercial applications.
- Arc Stability: Power output affects the stability of the welding arc, which is vital for achieving clean and consistent welds. Inverter welders with appropriate power output provide better arc control, reducing the likelihood of issues like spatter and incomplete fusion.
- Versatility: Selecting a welder with adequate power output expands its versatility across various welding processes, such as MIG, TIG, and stick welding. This adaptability can save costs and space by allowing a single machine to handle multiple types of projects.
What Are the Top DIY Inverter Welders Recommended by Experts?
The top DIY inverter welders recommended by experts are:
- Hobart Handler 140: This welder is praised for its versatility and ease of use, making it ideal for beginners and experienced welders alike. It operates on 115V power and can handle a variety of metals, offering a range of weld thicknesses.
- Lincoln Electric K2185-1: Known for its portability and reliable performance, this welder is great for DIY projects. It features a simple setup and adjustable voltage settings, allowing users to weld different materials effectively.
- Everlast PowerMTS 211si: This dual-function welder supports both MIG and TIG welding, making it a flexible choice for various applications. Its advanced inverter technology ensures efficient power usage while delivering consistent weld quality.
- Forney Easy Weld 261: This compact and lightweight welder is designed for ease of use, making it perfect for home projects. It operates on a 120V outlet and is capable of welding thin materials, providing a great entry point for novices.
- ESAB Rebel EMP 215ic: This all-in-one welder is highly regarded for its capability to weld multiple materials with precision. It features intuitive controls and a robust design, making it suitable for both DIY enthusiasts and professional welders.
What Safety Measures Should You Follow When Using a DIY Inverter Welder?
When using a DIY inverter welder, it is crucial to adhere to safety measures to protect yourself and others around you.
- Wear Protective Gear: Always use appropriate protective gear such as welding helmets, gloves, and flame-resistant clothing. This gear protects against sparks, UV radiation, and heat, reducing the risk of burns and eye injuries.
- Ensure Proper Ventilation: Work in a well-ventilated area to avoid inhaling harmful fumes produced during the welding process. Poor ventilation can lead to respiratory issues and increased exposure to toxic gases.
- Check Electrical Equipment: Regularly inspect your inverter welder and electrical connections for any signs of wear or damage. Faulty equipment can lead to electrical shocks or fires, so ensuring everything is in good working condition is vital.
- Maintain a Clean Workspace: Keep your workspace organized and free of flammable materials. Clutter can lead to accidents, and combustible items can ignite from sparks or heat generated during welding.
- Practice Safe Welding Techniques: Always follow proper welding techniques, including maintaining the correct distance from the workpiece and using the right welding settings. Improper techniques can result in poor welds and increase the risk of accidents.
- Have Fire Extinguishing Equipment Handy: Keep a fire extinguisher nearby and ensure it is suitable for metal fires. Being prepared for emergencies can help mitigate the risks associated with welding sparks igniting nearby materials.
- Know Emergency Procedures: Familiarize yourself with emergency procedures for your workspace, including exits and first aid. Knowing how to respond quickly in case of an accident can save lives and reduce injury severity.
How Can You Maintain Your DIY Inverter Welder for Optimal Performance?
To maintain your DIY inverter welder for optimal performance, consider the following practices:
- Regular Cleaning: Keep the inverter welder free from dust and debris by regularly cleaning its exterior and internal components.
- Inspect Electrical Connections: Periodically check all electrical connections, ensuring they are tight and free from corrosion to prevent any electrical failures.
- Monitor Cooling System: Ensure that the cooling system, including fans and vents, is functioning properly to prevent overheating during use.
- Check and Replace Consumables: Regularly inspect and replace consumables such as welding rods and tips to maintain welding quality.
- Calibration and Settings: Regularly calibrate the machine settings and ensure that they are appropriate for the materials being welded to achieve optimal results.
Regular cleaning of the inverter welder helps to prevent overheating and ensures efficient operation. Make sure to use a soft cloth and avoid using abrasive materials that could scratch the surface.
Inspecting electrical connections is crucial as loose or corroded connections can lead to erratic performance or even electrical hazards. Tightening any loose connections and cleaning corrosion with a suitable cleaner can extend the lifespan of your welder.
The cooling system plays a vital role in maintaining the welder’s performance during prolonged use. Make sure that fans are unobstructed and vents are clean to allow for proper airflow, which helps to dissipate heat effectively.
Consumables like welding rods and tips wear down over time, and using worn-out parts can lead to poor welding outcomes. Regularly check these items and replace them when necessary to ensure high-quality welds.
Calibration and settings adjustments are essential for tailoring the welder’s performance according to the specific materials being used. Regularly review and adjust settings like voltage and amperage to suit different welding tasks, ensuring optimal results every time.
Related Post: