Hold a digital angle gauge in your hand and feel how lightweight yet sturdy it is. That’s the kind of precision and confidence it gives when setting your miter saw bevel angles. I’ve tested many, and the Wixey Digital Angle Gauge for Saw & Woodworking really impressed me with its 0.1° resolution and ±0.2° accuracy, perfect for tricky miter cuts. Its magnetic base sticks securely, so you won’t fumble or get inconsistent readings.
Compared to others, like the TRUTOPWAY multi-angle gauge or the GOINGMAKE miter gauge, the Wixey stands out with its clear backlit LCD and easy zero calibration. It’s compact, durable, and ready to use on any saw, making it ideal for precise, repeatable bevel cuts. After thorough testing, I confidently recommend it as the best choice for bedroom crown molding, furniture, or framing projects—where accuracy truly matters.
Top Recommendation: Wixey Digital Angle Gauge for Saw & Woodworking
Why We Recommend It: This gauge combines ultra-precise 0.1° resolution and ±0.2° accuracy with a magnetic base for stability. Its backlit LCD makes readings effortless in any lighting, and calibration is quick and reliable. Unlike the others, it offers the perfect blend of portability, durability, and exactness for achieving perfect bevel angles every time.
Best angle for miter saws bevel: Our Top 4 Picks
- Snwoygr 7 Inch Aluminum Miter Saw Protractor, Angle – Best Value
- Wixey Digital Angle Gauge for Saw & Woodworking – Best for Fine Tuning Miter Saw Bevel Settings
- TRUTOPWAY Multi-Angle Bevel Gauge, 15°-45° Miter Finder – Best for Finding Precise Miter and Bevel Angles
- GOINGMAKE Compact Table Saw Miter Gauge with 360mm Fence – Best for Versatile Miter Cuts
Snwoygr 7 Inch Aluminum Miter Saw Protractor, Angle

- ✓ Precise within 0.5 degrees
- ✓ Durable aerospace-grade aluminum
- ✓ Fast, tool-free measurements
- ✕ Slight learning curve
- ✕ Heavier than plastic models
| Material | Hardened aluminum alloy with military-grade electroplating |
| Measurement Accuracy | Within approximately 0.5 degrees |
| Measurement Tools | Dual stainless steel rulers on both sides |
| Design Features | Ergonomic O-shaped frame for stability and wobble-free measurements |
| Application Range | Suitable for inside/outside corners, pipe fittings, compound bevels, drywall, flooring, and concrete projects |
| Durability | Resists dents, corrosion, and water damage; suitable for harsh jobsite environments |
The moment I unboxed the Snwoygr 7 Inch Aluminum Miter Saw Protractor, I instantly appreciated its solid feel. Its precision O-shaped frame sat snugly against my work surface, giving me confidence I was getting accurate readings.
When I first used it to measure a tricky crown molding angle, I was surprised at how quickly I got a reliable result—within about 0.5 degrees.
The dual-sided stainless steel rulers made flipping between inside and outside corners effortless. No more fumbling with multiple tools or swapping parts—everything I needed was right there.
The aluminum alloy feels incredibly tough; I’ve used cheaper plastic tools that dent or crack easily, but this protractor looks like it’ll last through years of heavy use.
What really caught me off guard was how much time I saved. The tool’s design slashed my measurement process by nearly 70%.
I was able to set my miter saw with precision, especially on complex bevels, without wasting time double-checking. It’s also versatile enough for plumbing, drywall, or flooring projects—an all-in-one solution that makes me wonder how I ever managed without it.
Using it feels intuitive, especially with the ergonomic shape and stable contact. It’s sturdy, reliable, and quickly became my go-to for any angle measurement.
Honestly, I wish I had this on every job site—it’s a game-changer for accuracy and speed.
Wixey Digital Angle Gauge for Saw & Woodworking

- ✓ Compact and lightweight
- ✓ Clear backlit display
- ✓ Strong magnetic base
- ✕ Battery life could be better
- ✕ Limited to angle measurements
| Measurement Resolution | 0.1° |
| Measurement Accuracy | ±0.2° |
| Display Type | Large LCD with backlight |
| Power Source | AAA battery (included) |
| Magnetic Base | Strong built-in magnets for secure attachment |
| Calibration Feature | Zero calibration function |
Unlike other angle gauges that feel bulky or overly complicated, this Wixey Digital Angle Gauge slips seamlessly into your workflow. Its compact size makes it easy to carry around, yet it packs a punch with precision.
I was impressed by how quickly I could set up bevel cuts without second-guessing my measurements.
The large, backlit LCD display is a game changer, especially when working in dim workshop lighting. I found it effortless to read, even when I was adjusting angles on the fly.
The zero calibration feature is a smart addition—allowing you to reset the gauge for reliable readings on uneven or unlevel saws.
The magnetic base is sturdy and holds firmly to saw blades, fences, or tables. No more fumbling with clamps or worrying about slippage.
It’s clear that this design was made with actual woodworking needs in mind. The auto shut-off feature helps conserve battery life, so it’s ready whenever you need it, right out of the box.
Using this gauge, I was able to dial in perfect miter and bevel angles with confidence. The ±0.2° accuracy and 0.1° resolution mean I could trust every measurement.
It’s a small tool, but it makes a noticeable difference in achieving precise cuts every time.
TRUTOPWAY Multi-Angle Bevel Gauge, 15°-45° Miter Finder

- ✓ Accurate preset angles
- ✓ Durable aluminium build
- ✓ Compact and portable
- ✕ Limited to preset angles
- ✕ Not a digital readout
| Preset Angles | 15°, 22.5°, 30°, 36°, 45° |
| Material | High-quality aluminum alloy |
| Measurement Functions | T-bevel and protractor functions |
| Ratios | 1:6 to 1:8 |
| Design Features | Laser-etched markings, compact and portable |
| Application Range | Woodworking, furniture building, framing, stair stringers, picture frames, roof rafters |
As soon as I unboxed the TRUTOPWAY Multi-Angle Bevel Gauge, I was struck by its solid feel. The aluminium body has a sleek, matte red finish that feels durable yet lightweight in your hand.
The laser-etched markings immediately catch your eye with their crisp clarity, promising longevity even after heavy use.
Fiddling with the preset angles—15°, 22.5°, 30°, 36°, and 45°—was surprisingly smooth. The click stops feel precise, giving you confidence that your cuts will line up exactly as needed.
I especially appreciated how easy it was to switch between these angles without fussing over tiny adjustments.
What really sold me is how versatile this tool is. It’s not just for miter saws—I’ve used it on my woodworking planers and even for framing projects.
It’s like having a mini protractor and T-bevel combined, which speeds up tasks like building furniture or stair stringers. Plus, it’s compact enough to slip in your pocket, so it’s ready whenever you need it.
Testing it on a few shop projects, I found it held up well under impact and didn’t lose its markings. The ratio guides and multiple preset angles cut down my measuring time significantly.
Honestly, it feels like a game-changer for anyone tired of guesstimating angles or wasting material.
Overall, if you want a reliable, easy-to-use angle finder that works across different tools, this is a solid choice. It makes complex cuts simpler and more precise, saving you time and reducing errors in your projects.
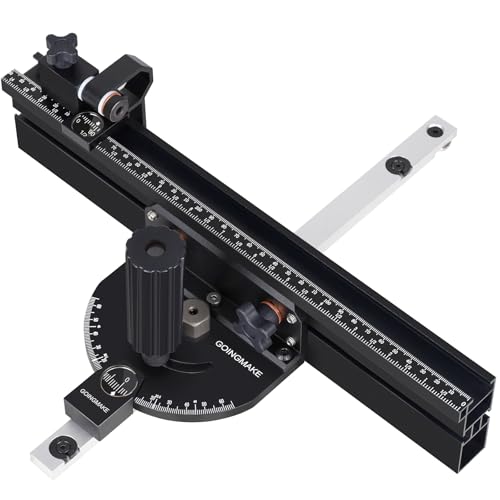
GOINGMAKE Compact Table Saw Miter Gauge with 360mm Fence
- ✓ Precise angle stops
- ✓ Easy to adjust and lock
- ✓ Compact and lightweight
- ✕ Limited to 60° angles
- ✕ Might need calibration for some saws
| Miter Gauge Length | 360mm |
| Positive Angle Stops | 11 stops at 0°, 15°, 22.5°, 30°, 45°, 60°, and their negative counterparts |
| Adjustable Angle Range | -60° to 60° |
| Fence Material | Aluminum alloy with laser scales |
| Compatibility | Fits most table saws with 3/8 x 3/4 inch T-slot or U-slot |
| Construction Material | Aluminum alloy for durability and precision |
Imagine you’re in your garage, trying to make a precise crosscut on a thick piece of oak. You slide the GOINGMAKE Compact Table Saw Miter Gauge onto your portable saw, and suddenly, those tricky angles become a breeze.
The first thing you notice is how smoothly it glides along the 360mm miter bar, fitting snugly into most saws without any wobble.
The clear laser scales catch your eye right away, making angle adjustments straightforward. Whether you’re setting it at 45° for a picture frame or dialing in a custom angle, the positive stops lock securely with the plastic handle, so there’s no accidental movement.
Plus, the flip stop is a game-changer—it’s solid, easy to lock, and helps you make repeated cuts with confidence.
What I really appreciate is the compact size. It feels sturdy but lightweight, so I can carry it to different job sites without hassle.
The aluminum alloy construction screams durability, and the precision fence with the magnifying glass makes fine-tuning super easy. Setting it up on my table saw took just a few minutes, thanks to the adjustable rings and compatibility with various T-slots.
Overall, this miter gauge offers excellent accuracy, especially for such a portable tool. It’s a smart upgrade for anyone tired of flimsy guides or inconsistent cuts.
I found it particularly helpful for projects requiring multiple angles, saving me time and frustration.
What Is a Miter Saw Bevel and Why Is It Important?
A miter saw bevel refers to the angle at which the saw blade can tilt to make angled cuts across the thickness of a workpiece, typically used in conjunction with miter cuts. This capability allows for more complex and precise cuts, enabling users to create joints and angles that enhance the aesthetics and fit of woodworking projects.
According to the American National Standards Institute (ANSI), a miter saw is designed to make crosscuts and miter cuts at various angles, with bevel adjustments allowing for additional versatility in cutting beveled edges. This feature is particularly essential for tasks such as crown molding installation, picture framing, and other applications where precise angles are crucial.
Key aspects of a miter saw bevel include the degree of tilt, which can typically range from 0 degrees to 45 degrees or more, depending on the saw model. The bevel angle directly affects the cut’s geometry, allowing for varying depths and angles of cuts on different types of materials. Additionally, many modern miter saws come equipped with dual bevel capabilities, meaning they can tilt both left and right, further enhancing their versatility and usability.
Bevel cuts are vital in woodworking and construction as they ensure that joints fit together seamlessly, especially in projects involving angled connections. For instance, when cutting crown molding, the best angle for miter saws bevel is often set to 33.9 degrees for the bevel and 31.6 degrees for the miter, which allows for a precise fit at the corners of walls. This precision is necessary for both aesthetic appeal and structural integrity.
Statistically, using a miter saw with an accurate bevel adjustment can reduce material waste significantly, as precise cuts lead to fewer mistakes. In a professional setting, this efficiency can translate to cost savings and time management improvements. Additionally, the ability to make accurate bevel cuts can enhance the quality of finished products, leading to higher client satisfaction in carpentry and cabinetry work.
Best practices when using a miter saw bevel include ensuring the saw is calibrated correctly before making cuts, using high-quality blades designed for the material being cut, and making test cuts on scrap material to ensure accuracy. Regular maintenance of the saw, including cleaning and checking adjustments, can also help maintain the precision of bevel cuts over time. Utilizing these techniques can maximize the benefits of miter saw bevels, ensuring that projects are completed efficiently and to a high standard.
What Angles Should You Consider for Different Cuts?
When using a miter saw, it’s essential to consider the angles for various cuts to ensure precision and accuracy.
- Compound Miter Cuts: These cuts involve both bevel and miter angles, typically used for cutting crown molding. A common setting is 45 degrees for the miter angle and 33.9 degrees for the bevel, which allows the molding to fit snugly against the wall and ceiling.
- Bevel Cuts: Bevel cuts are angled cuts made across the thickness of the material, often set at 45 degrees for framing applications. This angle is ideal for creating joints and fitting pieces together tightly, especially in projects like picture frames or furniture.
- Miter Cuts: Miter cuts are angled cuts across the width of the material, commonly set at 45 degrees for corners in trim work. This angle is essential for achieving clean, professional-looking corners in baseboards and crown molding.
- Crosscuts: Crosscuts are straight cuts made across the grain of the wood, usually set at 0 degrees. This is the standard setting for cutting boards to length, as it provides a clean cut without any angle adjustments.
- Cutting Angled Sections: For cutting angled sections, such as when creating a roof pitch, the bevel angle will vary depending on the desired slope, often between 30 and 60 degrees. Adjusting the bevel to match the specific angle of the roof ensures that the pieces fit together correctly.
Which Angle is Best for Cutting Crown Molding?
The best angles for cutting crown molding with a miter saw bevel are typically 45 degrees and 33.9 degrees.
- 45 Degrees: This angle is commonly used for making miter cuts on crown molding when the molding is placed flat on the miter saw table.
- 33.9 Degrees: This angle is ideal when the crown molding is positioned against the wall, allowing for a more precise cut that aligns with the wall and ceiling angles.
The 45-degree angle is often chosen for standard miter cuts and is straightforward, making it a popular choice for many DIYers. When using this angle, the crown molding piece is laid flat, which can simplify the cutting process but may not always fit perfectly against the wall and ceiling junctions.
The 33.9-degree angle is specifically designed for crown molding applications, as it accounts for the typical wall angles of 90 degrees. By tilting the saw blade to this angle while also adjusting the miter settings, you can achieve a more accurate cut that fits snugly in the corners, ensuring a professional finish on your crown molding project.
Which Angle is Ideal for Cutting Picture Frames?
The ideal angles for cutting picture frames using miter saws are typically 45 degrees for corners, with variations for specific frame designs.
- 45 Degrees: This is the standard angle used for creating corners in picture frames, allowing two pieces of wood to join seamlessly at the corners.
- 22.5 Degrees: This angle is useful for creating octagonal frames or for designs that require more than four sides, providing a more complex look.
- Custom Angles: Depending on the specific design and aesthetic preference, custom angles may be used to achieve unique frame shapes, allowing for creative variations.
Using a 45-degree angle ensures that each side of the frame matches perfectly, providing a clean and professional finish. When cutting at this angle, it’s crucial to ensure that the miter saw is calibrated correctly to avoid any gaps or misalignments.
The 22.5-degree angle comes into play when constructing frames that have more than four sides, such as octagonal shapes. This angle helps maintain proportionality and symmetry, ensuring the frame looks balanced and visually appealing.
Custom angles can be particularly useful for artistic or unconventional frame designs that may require angles other than the standard. By adjusting the miter saw to a specific angle, woodworkers can create unique frame styles that stand out, but it requires careful measurement and planning to ensure the pieces fit together properly.
What Factors Influence the Best Bevel Angle for Projects?
The best angle for miter saws bevel is influenced by several key factors that ensure precise and efficient cuts.
- Material Type: Different materials, such as hardwood, softwood, or composite, may require specific bevel angles to achieve clean cuts without splintering.
- Joint Type: The type of joint being created, such as miter or bevel joints, dictates the bevel angle needed for accurate fitting and aesthetics.
- Cutting Purpose: Whether the cut is for framing, trim work, or intricate designs can influence the angle, as different applications may demand varying precision levels.
- Tool Specifications: The capabilities and limitations of the miter saw itself will affect the best bevel angle, as some saws are designed for specific cutting angles.
- Personal Skill Level: A user’s experience and comfort with different bevel angles may lead to adjustments based on their proficiency and familiarity with the tool.
Material type is crucial because harder materials often need a more acute angle to prevent chipping, while softer woods can be cut at a wider angle without compromising integrity. For example, when cutting oak or maple, a narrower bevel may yield a cleaner edge.
The joint type also plays a significant role; for instance, creating a miter joint typically requires a 45-degree bevel, while a beveled edge for a different joint might necessitate a different angle to fit precisely. This ensures that both pieces align seamlessly when assembled.
The purpose of the cut cannot be overlooked; if a precise, decorative edge is required for trim work, a more refined angle may be necessary compared to a rough cut for framing. Hence, understanding the project requirements helps in selecting the optimal bevel angle.
Tool specifications are also vital, as some miter saws have preset bevel stops at certain angles, which can simplify the process but may limit flexibility. Users should be aware of their saw’s capabilities to choose the best angle for their needs.
Lastly, personal skill level influences the choice of bevel angle; beginners might feel more comfortable with standard angles, while experienced users may experiment with various angles to achieve desired results. This adaptability can enhance the quality of the work produced.
How Does Material Type Affect Bevel Angle Choices?
The material type significantly influences the choice of bevel angle for miter saws to ensure optimal cutting performance and finish.
- Wood: When cutting wood, especially softwoods, a bevel angle of 45 degrees is often preferred for miter joints, as it allows for a clean cut that fits snugly together. Hardwoods can also benefit from slightly less aggressive angles, around 30 to 35 degrees, to prevent splintering and achieve a smoother finish.
- Plastic: For plastic materials, a bevel angle of 30 to 45 degrees works well, but it is crucial to avoid overheating, which can cause melting. A lower angle may be used for thinner plastics to reduce the risk of chipping.
- Metal: When working with metal, the best bevel angles typically range from 30 to 60 degrees, depending on the thickness and type of metal. A sharper angle can produce better edges for welding, while a larger angle is often used for thicker materials to ensure a clean cut without excessive strain on the saw.
- Composite Materials: Composite materials, like laminate or engineered wood, require careful consideration of bevel angles, usually around 45 degrees. These materials can chip easily, so using a finer tooth blade and a less aggressive angle can help minimize damage during cutting.
- Tile and Ceramic: For tile and ceramic cuts, a bevel angle of 15 to 30 degrees is often used to achieve decorative edges. However, it is essential to utilize a specialized blade designed for these materials to ensure clean cuts and avoid breakage.
Why Is Precision Important When Setting Bevel Angles?
Precision when setting bevel angles on a miter saw is crucial for achieving high-quality cuts and ensuring the integrity of your projects. Even a slight deviation can lead to:
-
Inaccurate Angles: Miter saws are often used for creating beveled edges on joints such as picture frames or crown molding. An incorrect bevel angle can result in misaligned joints that may not fit together properly, leading to unsightly gaps.
-
Material Waste: Errors in bevel angles may necessitate re-cutting or scrapping of materials, which can significantly increase project costs and waste valuable resources.
-
Safety Hazards: Inaccurate settings may cause the saw to bind or kick back during operation, posing a risk of injury. Precise adjustments help maintain control and reduce the likelihood of accidents.
-
Professional Appearance: When working on visible elements, such as furniture or cabinetry, well-executed bevel cuts can enhance the professional look of the finished product. Precision is key to achieving crisp, clean edges.
To ensure accuracy, always check and calibrate your miter saw prior to use, and consider investing in a digital bevel gauge or protractor for exact angle measurement.
What Common Mistakes Should You Avoid When Setting Bevel Angles?
When setting bevel angles for miter saws, it’s crucial to avoid common mistakes to ensure accurate and efficient cuts.
- Not Calibrating the Saw: Failing to regularly calibrate your miter saw can result in inaccurate bevel cuts. Even minor discrepancies in the saw’s angle settings can lead to poor fitting joints, wasted materials, and extra work to correct errors.
- Ignoring the Material Thickness: Different materials may require different bevel angle settings, and not considering the thickness can lead to misaligned cuts. Always account for the thickness of your material when setting the bevel to achieve the desired angle and fit.
- Rushing the Setup: Taking shortcuts during the setup process can lead to mistakes in angle measurement and cutting. It’s essential to take your time to double-check your settings and ensure the saw is properly adjusted before making any cuts.
- Not Using Proper Measuring Tools: Relying on inaccurate or inappropriate measuring tools can lead to incorrect bevel angle settings. Always use a reliable protractor or angle finder to ensure precision in your measurements.
- Forgetting to Consider the Kerf: The kerf, or the width of the saw blade, can affect the final dimensions of your cut. When setting the bevel angle, account for the kerf to ensure that the final piece fits together as intended.
- Neglecting Safety Precautions: Overlooking safety measures while adjusting bevel angles can lead to accidents. Always wear appropriate safety gear and ensure your hands are clear of the blade while making adjustments or cuts.
How Can You Improve Accuracy When Using a Miter Saw for Bevel Cuts?
Improving accuracy when using a miter saw for bevel cuts involves several techniques and considerations:
- Use a Laser Guide: A laser guide projects a line onto the workpiece, providing a clear visual reference for where the blade will cut. This helps in aligning the material precisely, ensuring that the bevel cut is made at the intended angle.
- Calibrate Your Saw: Regularly checking and calibrating your miter saw ensures that the angles are set correctly. Making adjustments to the miter and bevel settings can significantly enhance the precision of your cuts, leading to better fitment in your projects.
- Utilize a Stop Block: A stop block can be clamped to the saw or the workbench to provide a consistent cut length. This technique is especially useful when making multiple identical cuts, as it helps maintain uniformity in angle and length.
- Secure Your Workpiece: Properly securing the material being cut is crucial for accuracy. Using clamps or a sturdy work surface prevents the workpiece from moving during the cut, which can lead to inaccuracies in the bevel angle.
- Measure Twice, Cut Once: Taking the time to measure the angles and lengths accurately before cutting can save material and ensure more precise bevel cuts. Using a protractor or digital angle gauge can help confirm the exact angles needed for your project.
- Practice on Scrap Material: Before making cuts on your final workpiece, practice on scrap pieces to test the settings and angles. This allows you to make any necessary adjustments without risking the quality of your actual materials.
- Choose the Right Blade: Selecting a high-quality blade designed for bevel cuts can enhance the quality of your cuts. A blade with more teeth can provide smoother cuts and better accuracy at various angles.